
For years I’ve been buying these rolls.
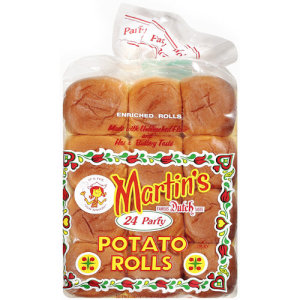
They’ve been a staple in our house from the time my children were little, in fact, I ate them when I was little. Now, with a different food perspective, I am reluctant to buy them. There’s an article here that explains why. (And! Did you know they’re not yellow because of eggs or butter?! They add coloring to make it look like that.) Love the Food Babe and the information that she brings to light. Here’s another blogger who explains what Martin’s has changed in their formula in light of the Food Babe’s efforts. Kudos for stepping up your game, Martin’s. I still think I can make a simple recipe at home even better.
In order to find a recipe to take the place of yet another packaged item in our home, I went to my recipe box. I remembered that my aunt had given me a recipe many years ago that seemed to be a similar texture to the packaged rolls. Could I adapt that recipe to resemble these potato rolls. I didn’t need them to be fake yellow or to have potato in them. After all, they just use potato flour. It’s not like they’re using up leftover mashed potatoes to make use of what’s in the fridge. I just needed them to be made of on-hand ingredients, easy to prepare and light an fluffy when they were baked.
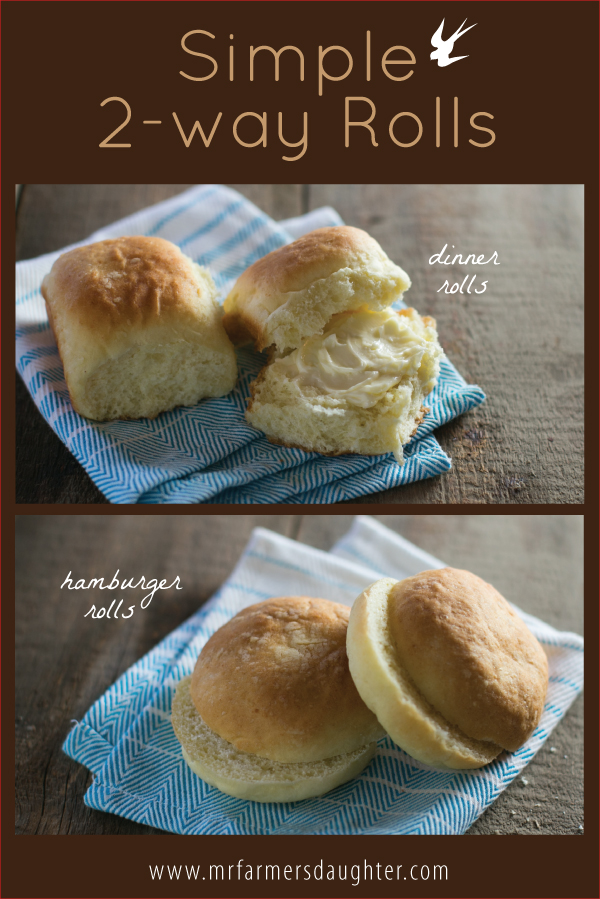
I made them as dinner rolls for months then realized that I could probably shape them to be hamburger buns too. So, now, I make half the recipe as dinner rolls (This half makes 12) and half as hamburger rolls (This half makes 6). I freeze what we don’t use right away. They keep in the freezer well for about a month.
Please note: These ARE NOT gluten-free. These are wheat rolls and include both eggs and dairy. The use of ricotta cheese keeps these little gems especially tender.
- 2 c. ricotta cheese, whole fat
- 2 pkgs (4-1/2 tsp.) yeast
- 2 eggs (preferably from pastured chickens)
- 1 tsp. sea or Celtic salt
- 2 Tbls. butter, melted
- ⅓ c. warm water
- ¼ c. cane sugar, divided
- ½ tsp. baking soda
- 4-1/2 to 5 c. flour (preferably organic)
- In large bowl, combine 1 Tbls. sugar with ⅓ c. water.
- Sprinkle yeast over sugar water and let sit until foamy.
- Meanwhile combine ricotta cheese, eggs and butter in bowl.
- Mix together dry ingredients (4-1/2 cup flour, remaining sugar, salt and baking soda).
- Keep ½ cup flour set aside.
- When yeast is foamy, combine all ingredients in large bowl and mix until dough comes together.
- Turn out onto floured surface and knead for about 5 minutes adding flour as needed.
- Dough should feel elastic and smooth, not dry but not sticking to your fingers.
- Allow to rise in a warm place in a large buttered bowl covered with plastic wrap until doubled in size.
- When doubled, turn out on floured surface and knead for 30 seconds.
- Heat oven to 350˚
- For making dinner rolls:
- Weigh* your dough by ounces or grams and divide by 24. Break off pieces of dough in the determined weight and lightly knead making a smooth ball by rolling the edges underneath. Place each dough piece in a 9”x13”, lightly greased, baking dish. Make a grid of 6 across by 4 down. They do not need to be touching. Bake at 350˚ until rolls are golden brown on top and firm to the touch.
- For making hamburger rolls:
- Weigh* your dough by ounces or grams and divide by 12. Break off pieces of dough in the determined weight and lightly knead making a smooth ball by rolling the edges underneath. Place each dough piece on a baking sheet lined with parchment. Make sure to leave about 2” between rolls. They will double in size. Bake at 350˚ until rolls are golden brown on top and firm to the touch.
* This recipe is best if you use a scale for weighing the prepped dough. It helps keep the proportions even which assists baking and ensures that smaller rolls aren’t dry while larger rolls may not be fully baked. It is possible to make this recipe without a scale. You would just need to be very particular about making all the dough balls the same size.
4 comments
Thanks Kitty & Cherise. I think I tried that at some point, but I likely needed better directions as you have provided above. I’ll give it a try 🙂
Here’s my biggest fear about recipes like this. I have no warm place for dough to rise. I’ve tried a few times, and it never seems to work. Any recommendations to help me get over this fear?
If you have an oven, Janene, you have a warm place for dough to rise. I turn the oven on a low setting for about 10 minutes or so, then turn the oven off. Once the dough is ready to start rising (Step 9 in the above directions), place it in the warmed oven. If you keep the door closed while it’s rising, it should work just fine. Sometimes I put a small, oven-proof dish (like a Pyrex measuring cup) of water in the oven with the dough, too.
When I was young, my parents would put a few inches of scalding water in the bathtub & place bread pans in the tub to rise, closing both the shower curtain & the bathroom door. It smelled so good in there!
Maybe Cherise has a better solution, but both of these options have worked in my family. 🙂
Janene – I agree with what Kitty said. I have used both methods. Although I have a proofing feature on my range I don’t ever use it. It’s in the bottom drawer which is far to shallow to proof dough in a bowl. I use the hot water in the oven method. Boil water and place in a shallow 9×13 pan. Close door. Allow the oven to heat up for a few minutes then put your bowl of dough in. I cover my bowl loosely with plastic wrap. Allow to rise without opening the door. Turning the light on will add just a little more heat too if your oven is older. Happy proofing!